
[av_textblock size=” av-medium-font-size=” av-small-font-size=” av-mini-font-size=” font_color=” color=” id=” custom_class=” av_uid=’av-k8y2ql1a’ admin_preview_bg=”]
“I never try to create the prettiest picture while I’m out in the field. Rather, I try to capture the best possible data.”
In this age of ubiquitous cameras and instant gratification whenever we snap a pic of something beautiful we want to see a gorgeous, punchy, saturated picture instantly appear on the back of our camera. In fact, I’ve heard more than one landscape photographer lament that their iPhone takes better pictures than their expensive DSLR. And while the iPhone photos may indeed look better right off the bat, it’s only because the phone is applying some automatic post-processing to increase saturation, contrast, and detail. And while all DSLRs should have the same kind of insta-processing built into them in the form of Picture Styles/Controls, using those punchy Vivid or Landscape styles in the field can be a mistake, for two reasons.
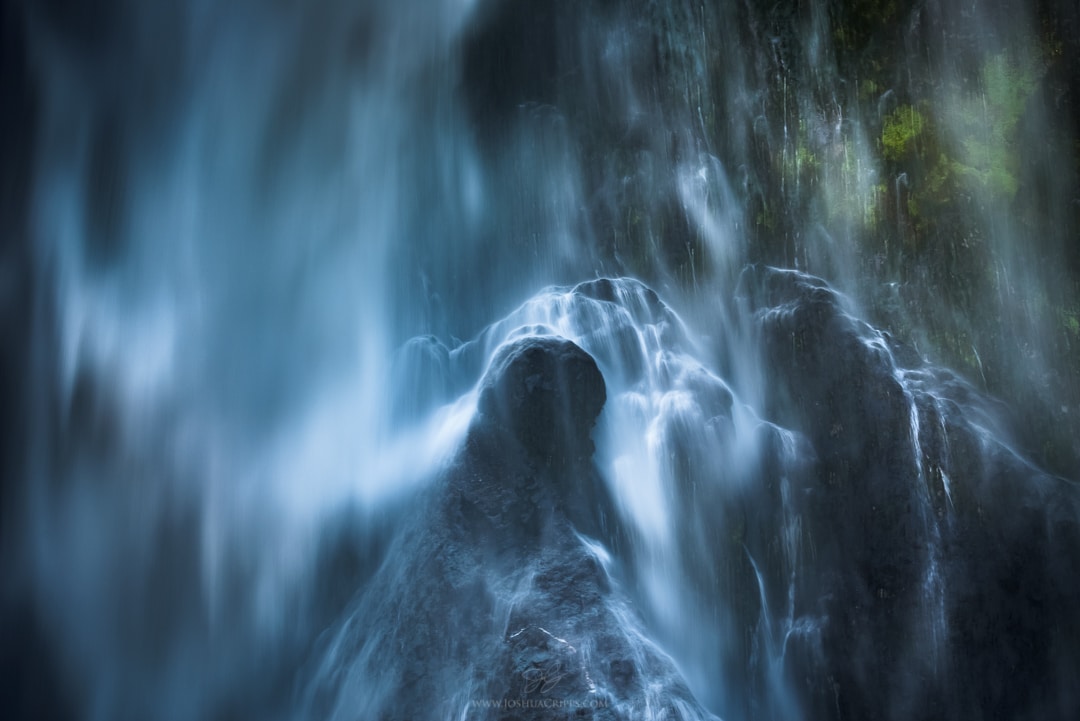
First, those picture styles effect the histogram you see when reviewing a photo on your camera, and the more punchy your picture style is the less accurately your histogram will reflect the actual raw data of your photo (assuming you’re shooting raw. You’re shooting raw, right??). Meaning the camera settings you’ve chosen might not actually be best for that scene. The second reason is that no matter how good those picture styles can make your photo look in the field, you can tune your processing with much more fidelity, accuracy, and subtlety by using a post-processing program like Lightroom or Photoshop. And so because of that, I never try to create the prettiest picture while I’m out in the field. Rather, I try to capture the best possible data. Because I know I can sculpt that data into a beautiful photo later in post. Let’s take a look at an example from Stirling Falls in New Zealand.
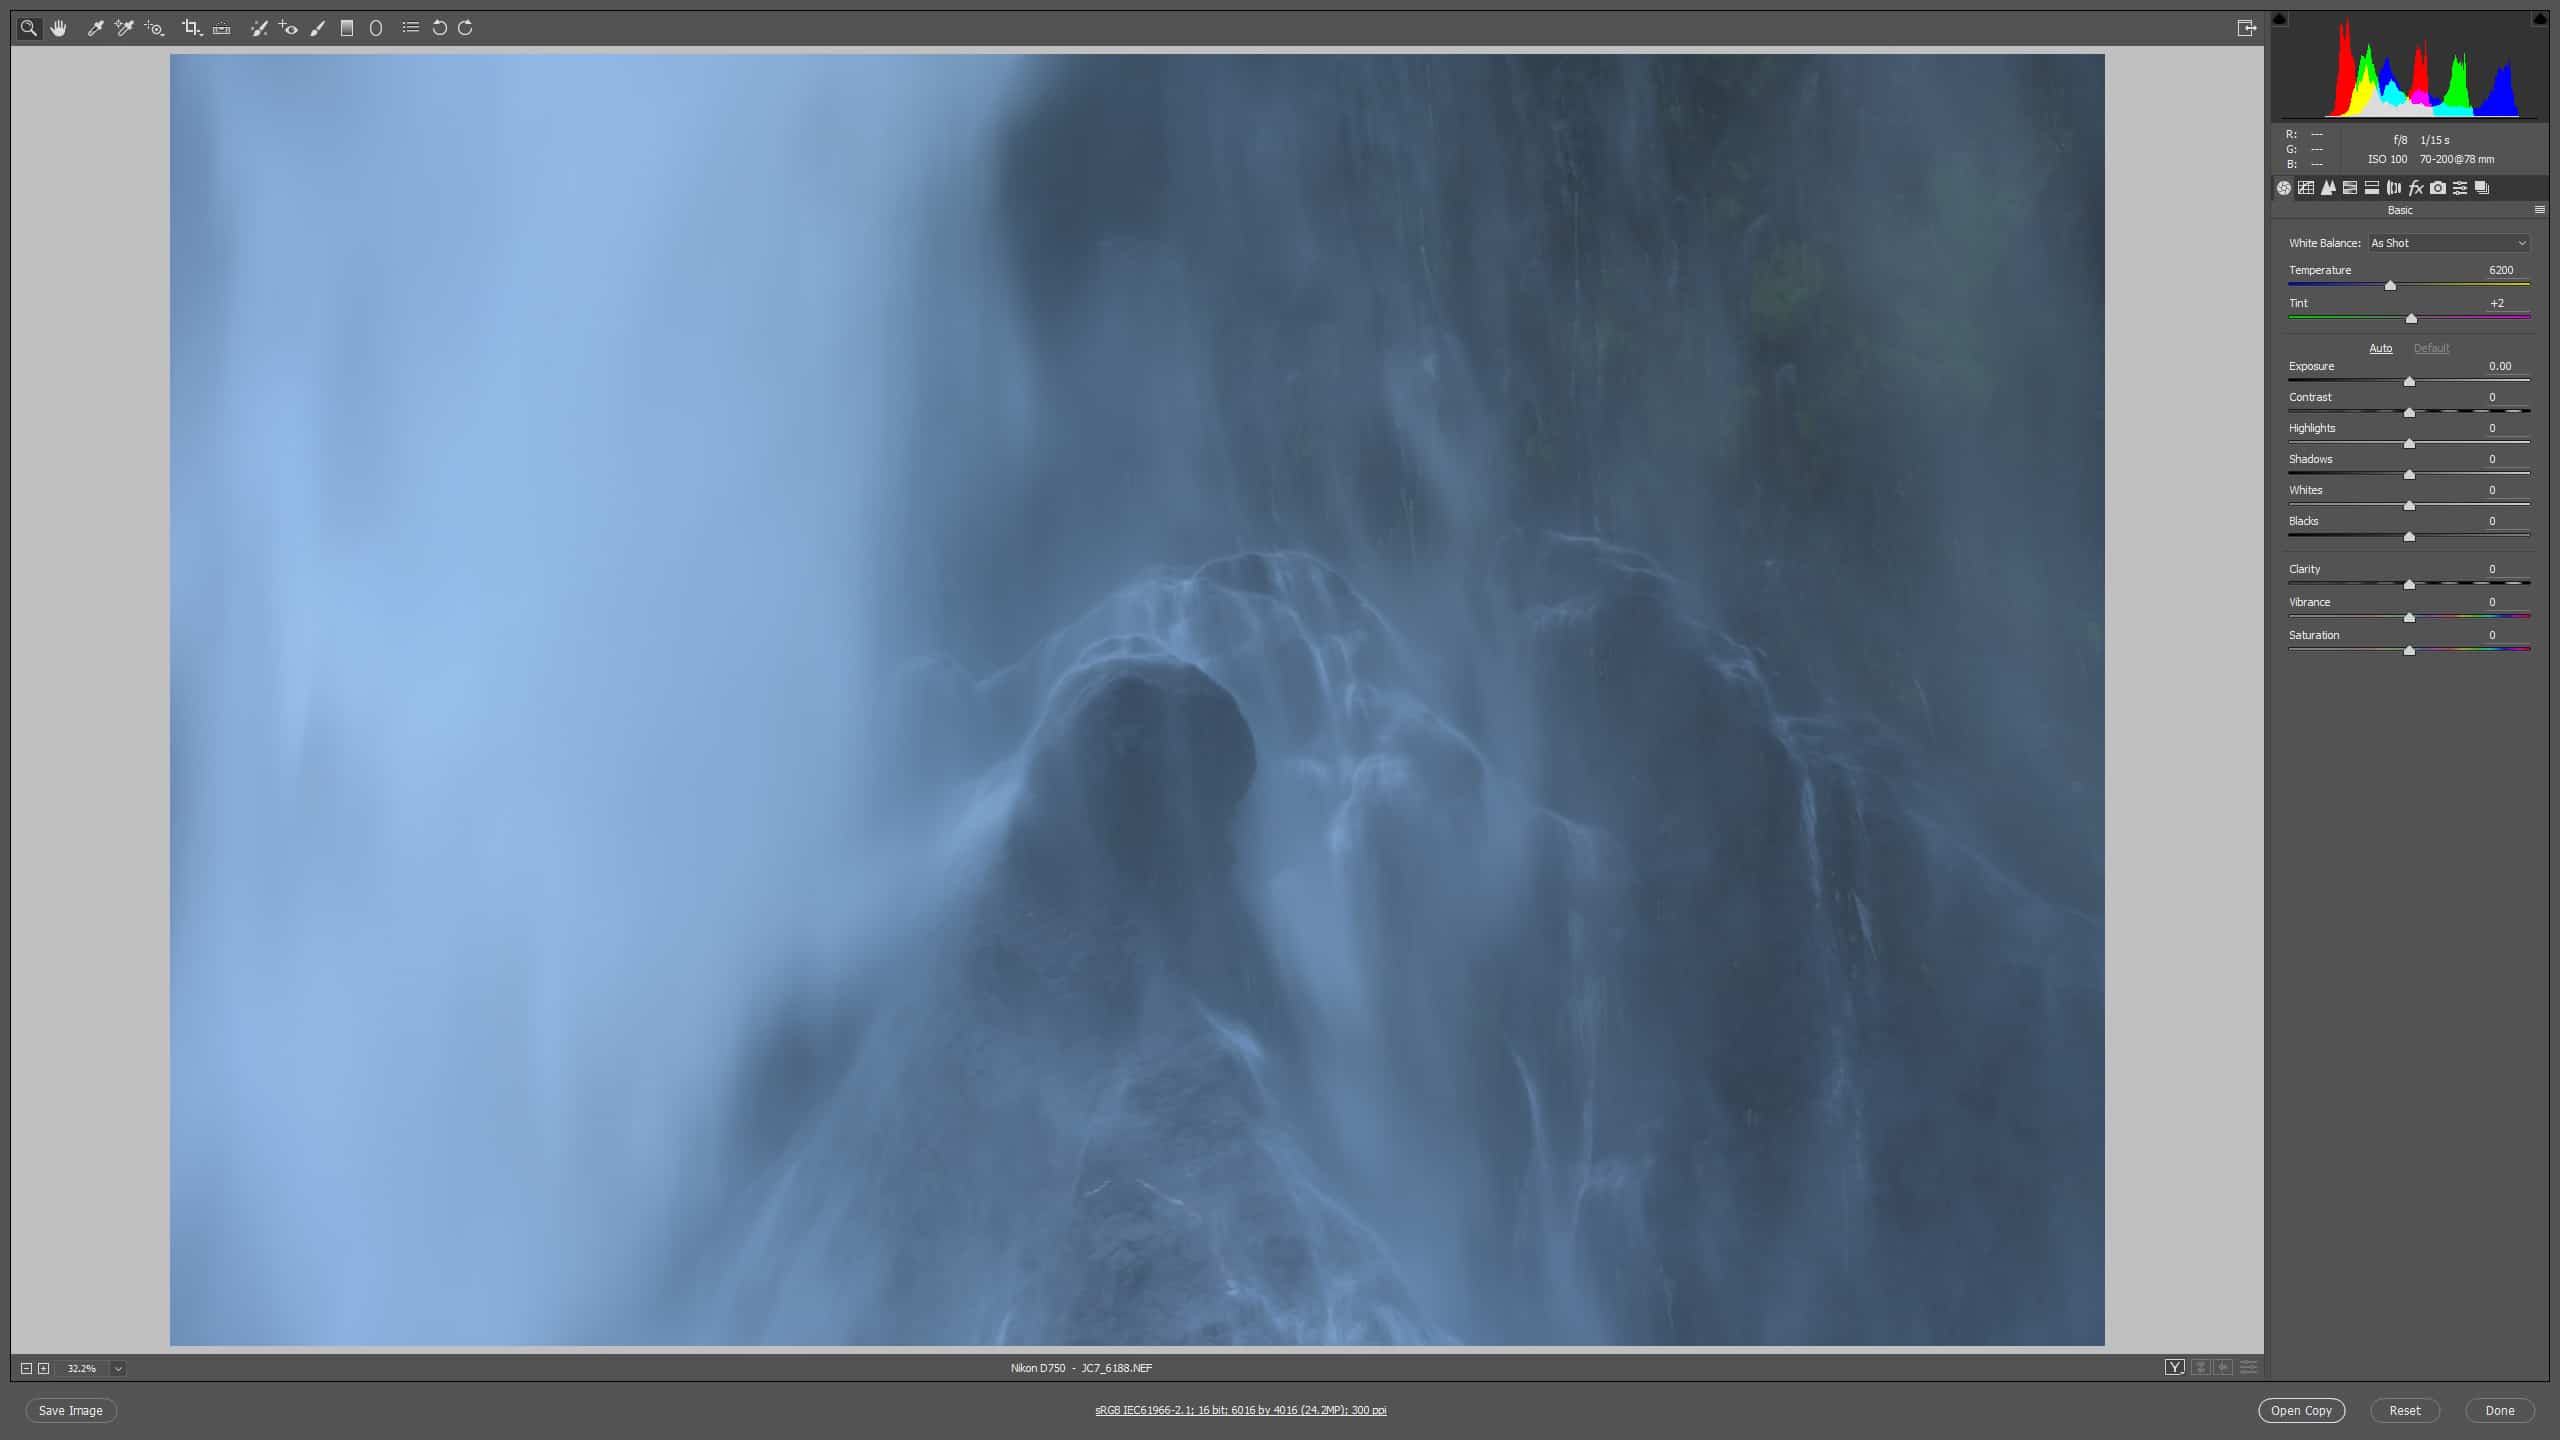
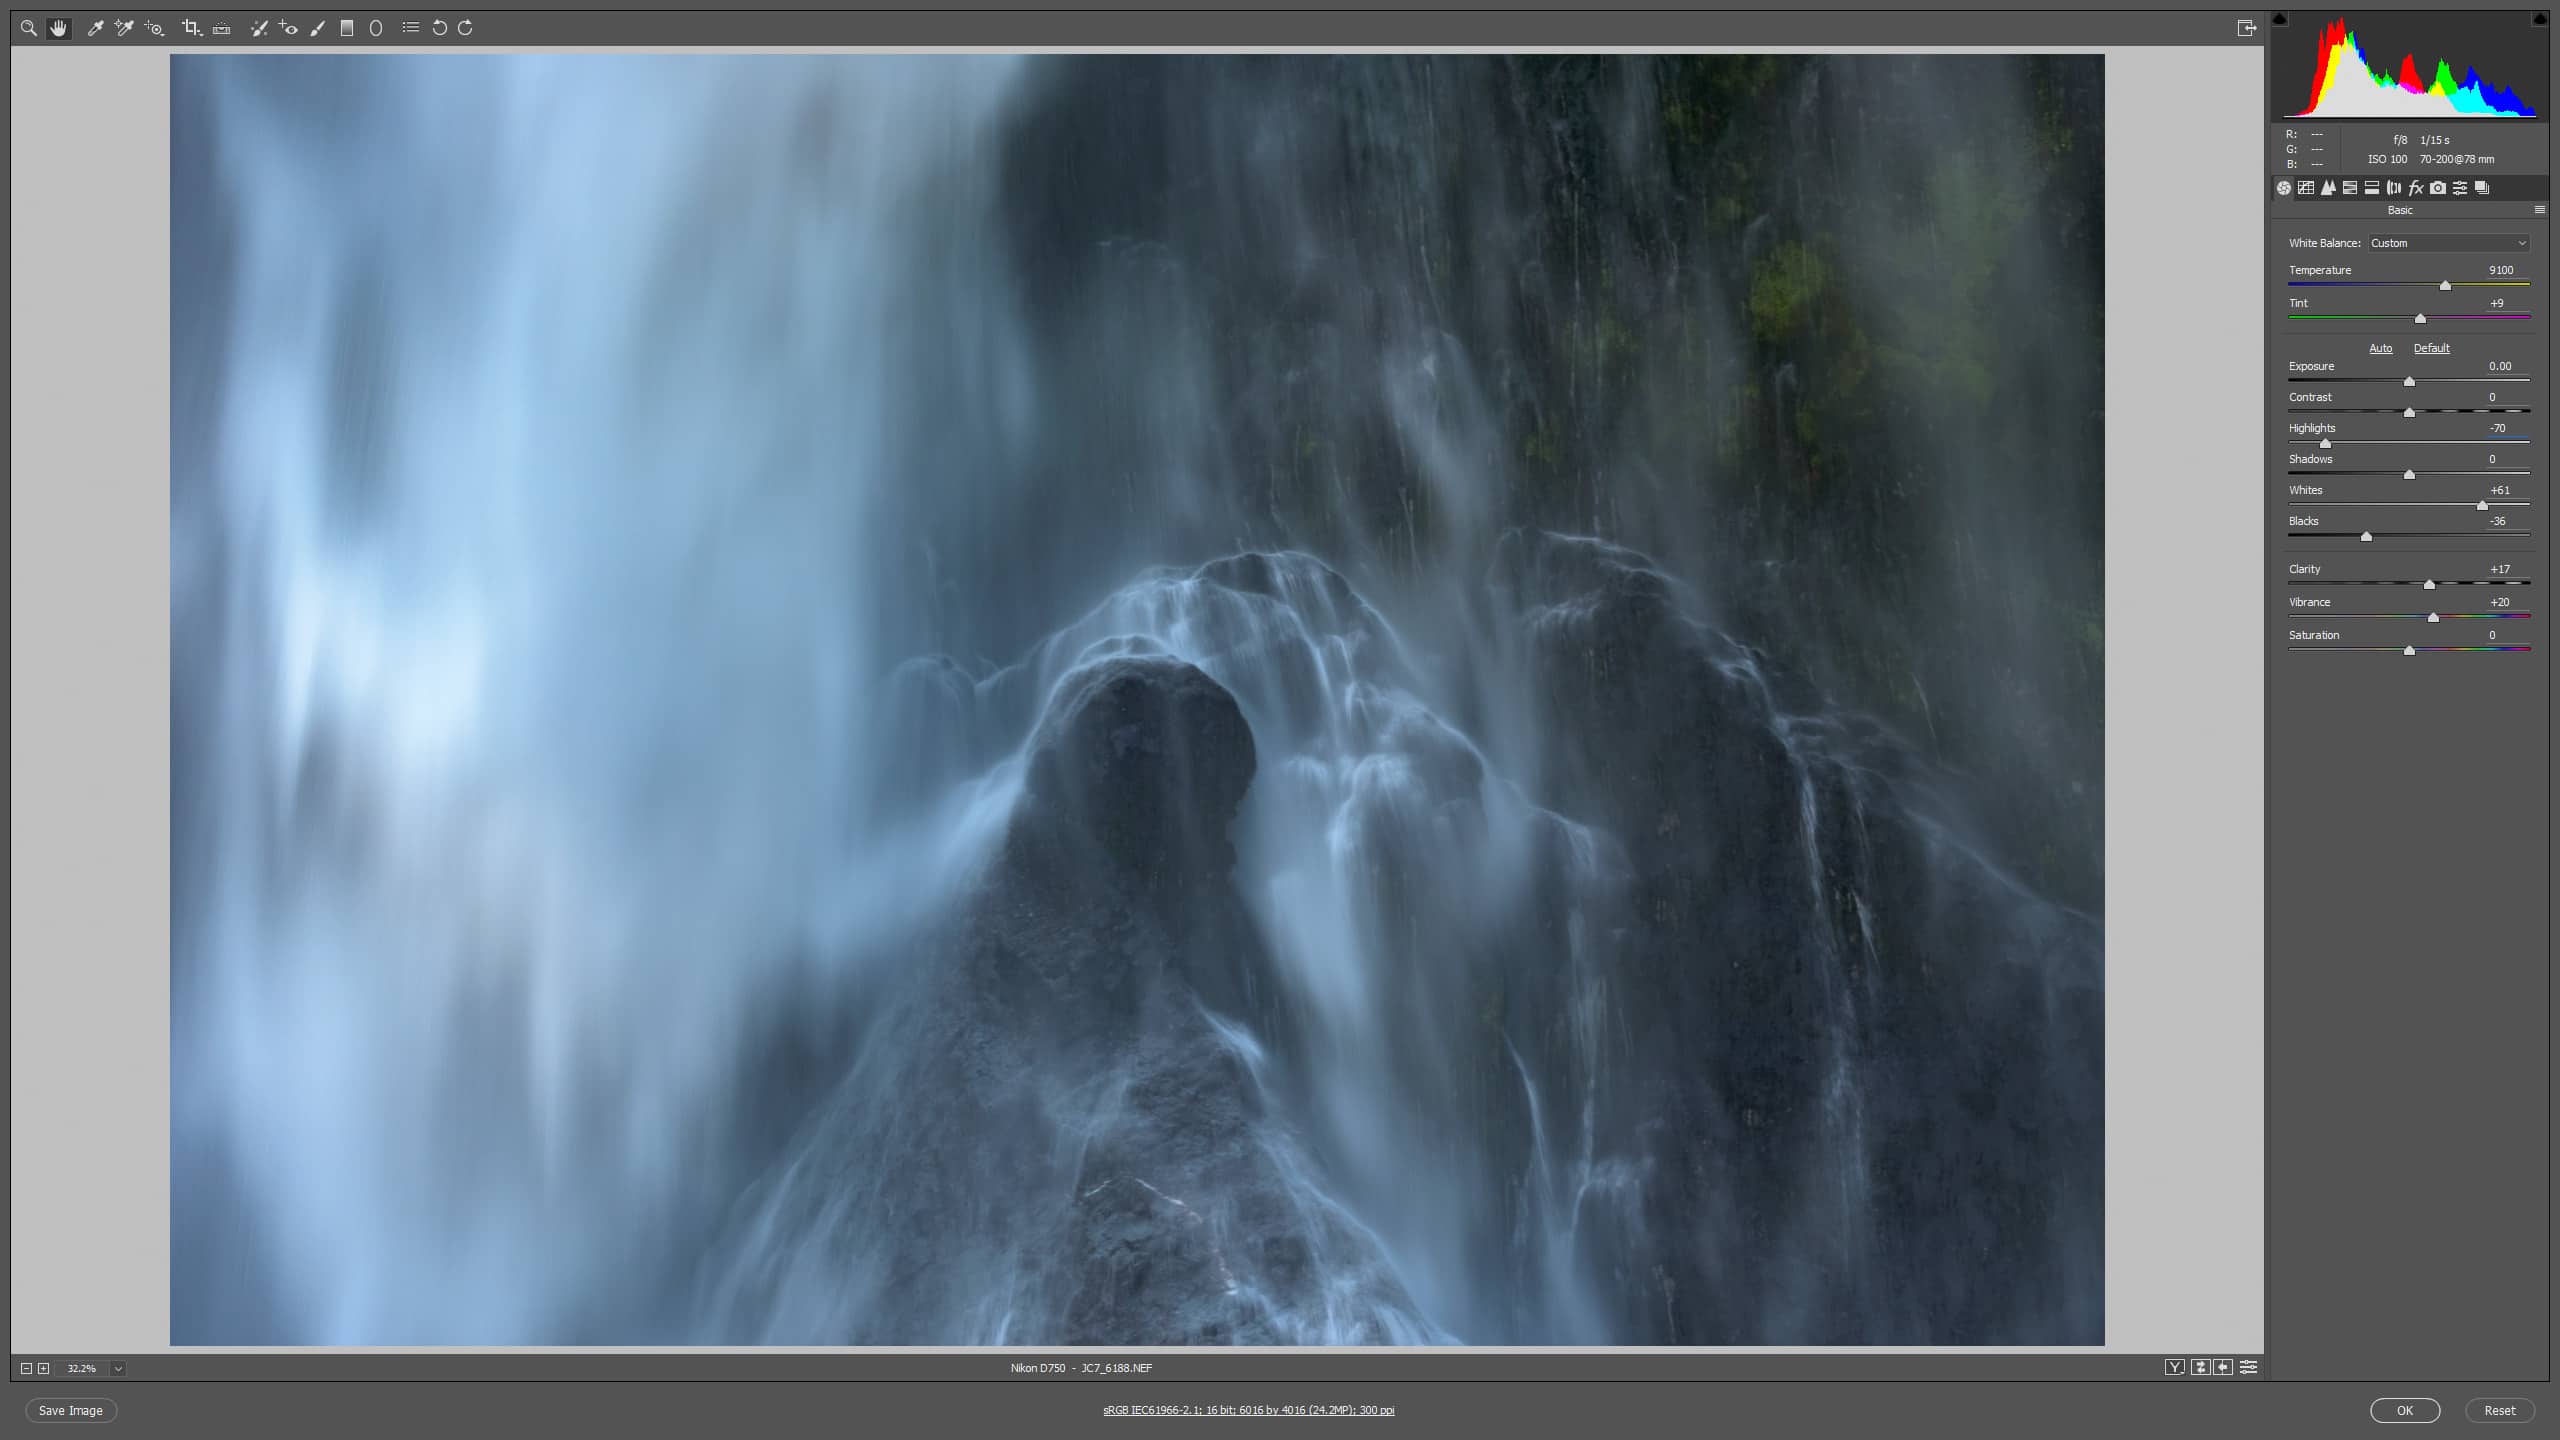
I’ll talk quickly about how I took the photo, then walk through the processing steps I took. For the capture itself I was standing on the deck of a moving boat, and because of that I knew I couldn’t pull off the typical long-shutter silkyness I often like in waterfall shots. But I still wanted a little motion, so I figured targeting a shutter speed of around 1/15 sec would get me some movement, while crossing my fingers that using Vibration Reduction -as well as having my camera mounted on a monopod- would let me hold sharp detail in the rocks. I had a polarizer on the lens, and with my ISO at 100 I found that an aperture of f/8 gave me a perfect exposure for my 1/15 sec shutter. I was using Nikon’s Flat picture control, and while you can see that the photo itself does indeed look very flat, the histogram is just about perfect, spanning a good dynamic range but without any clipped shadows or highlights.
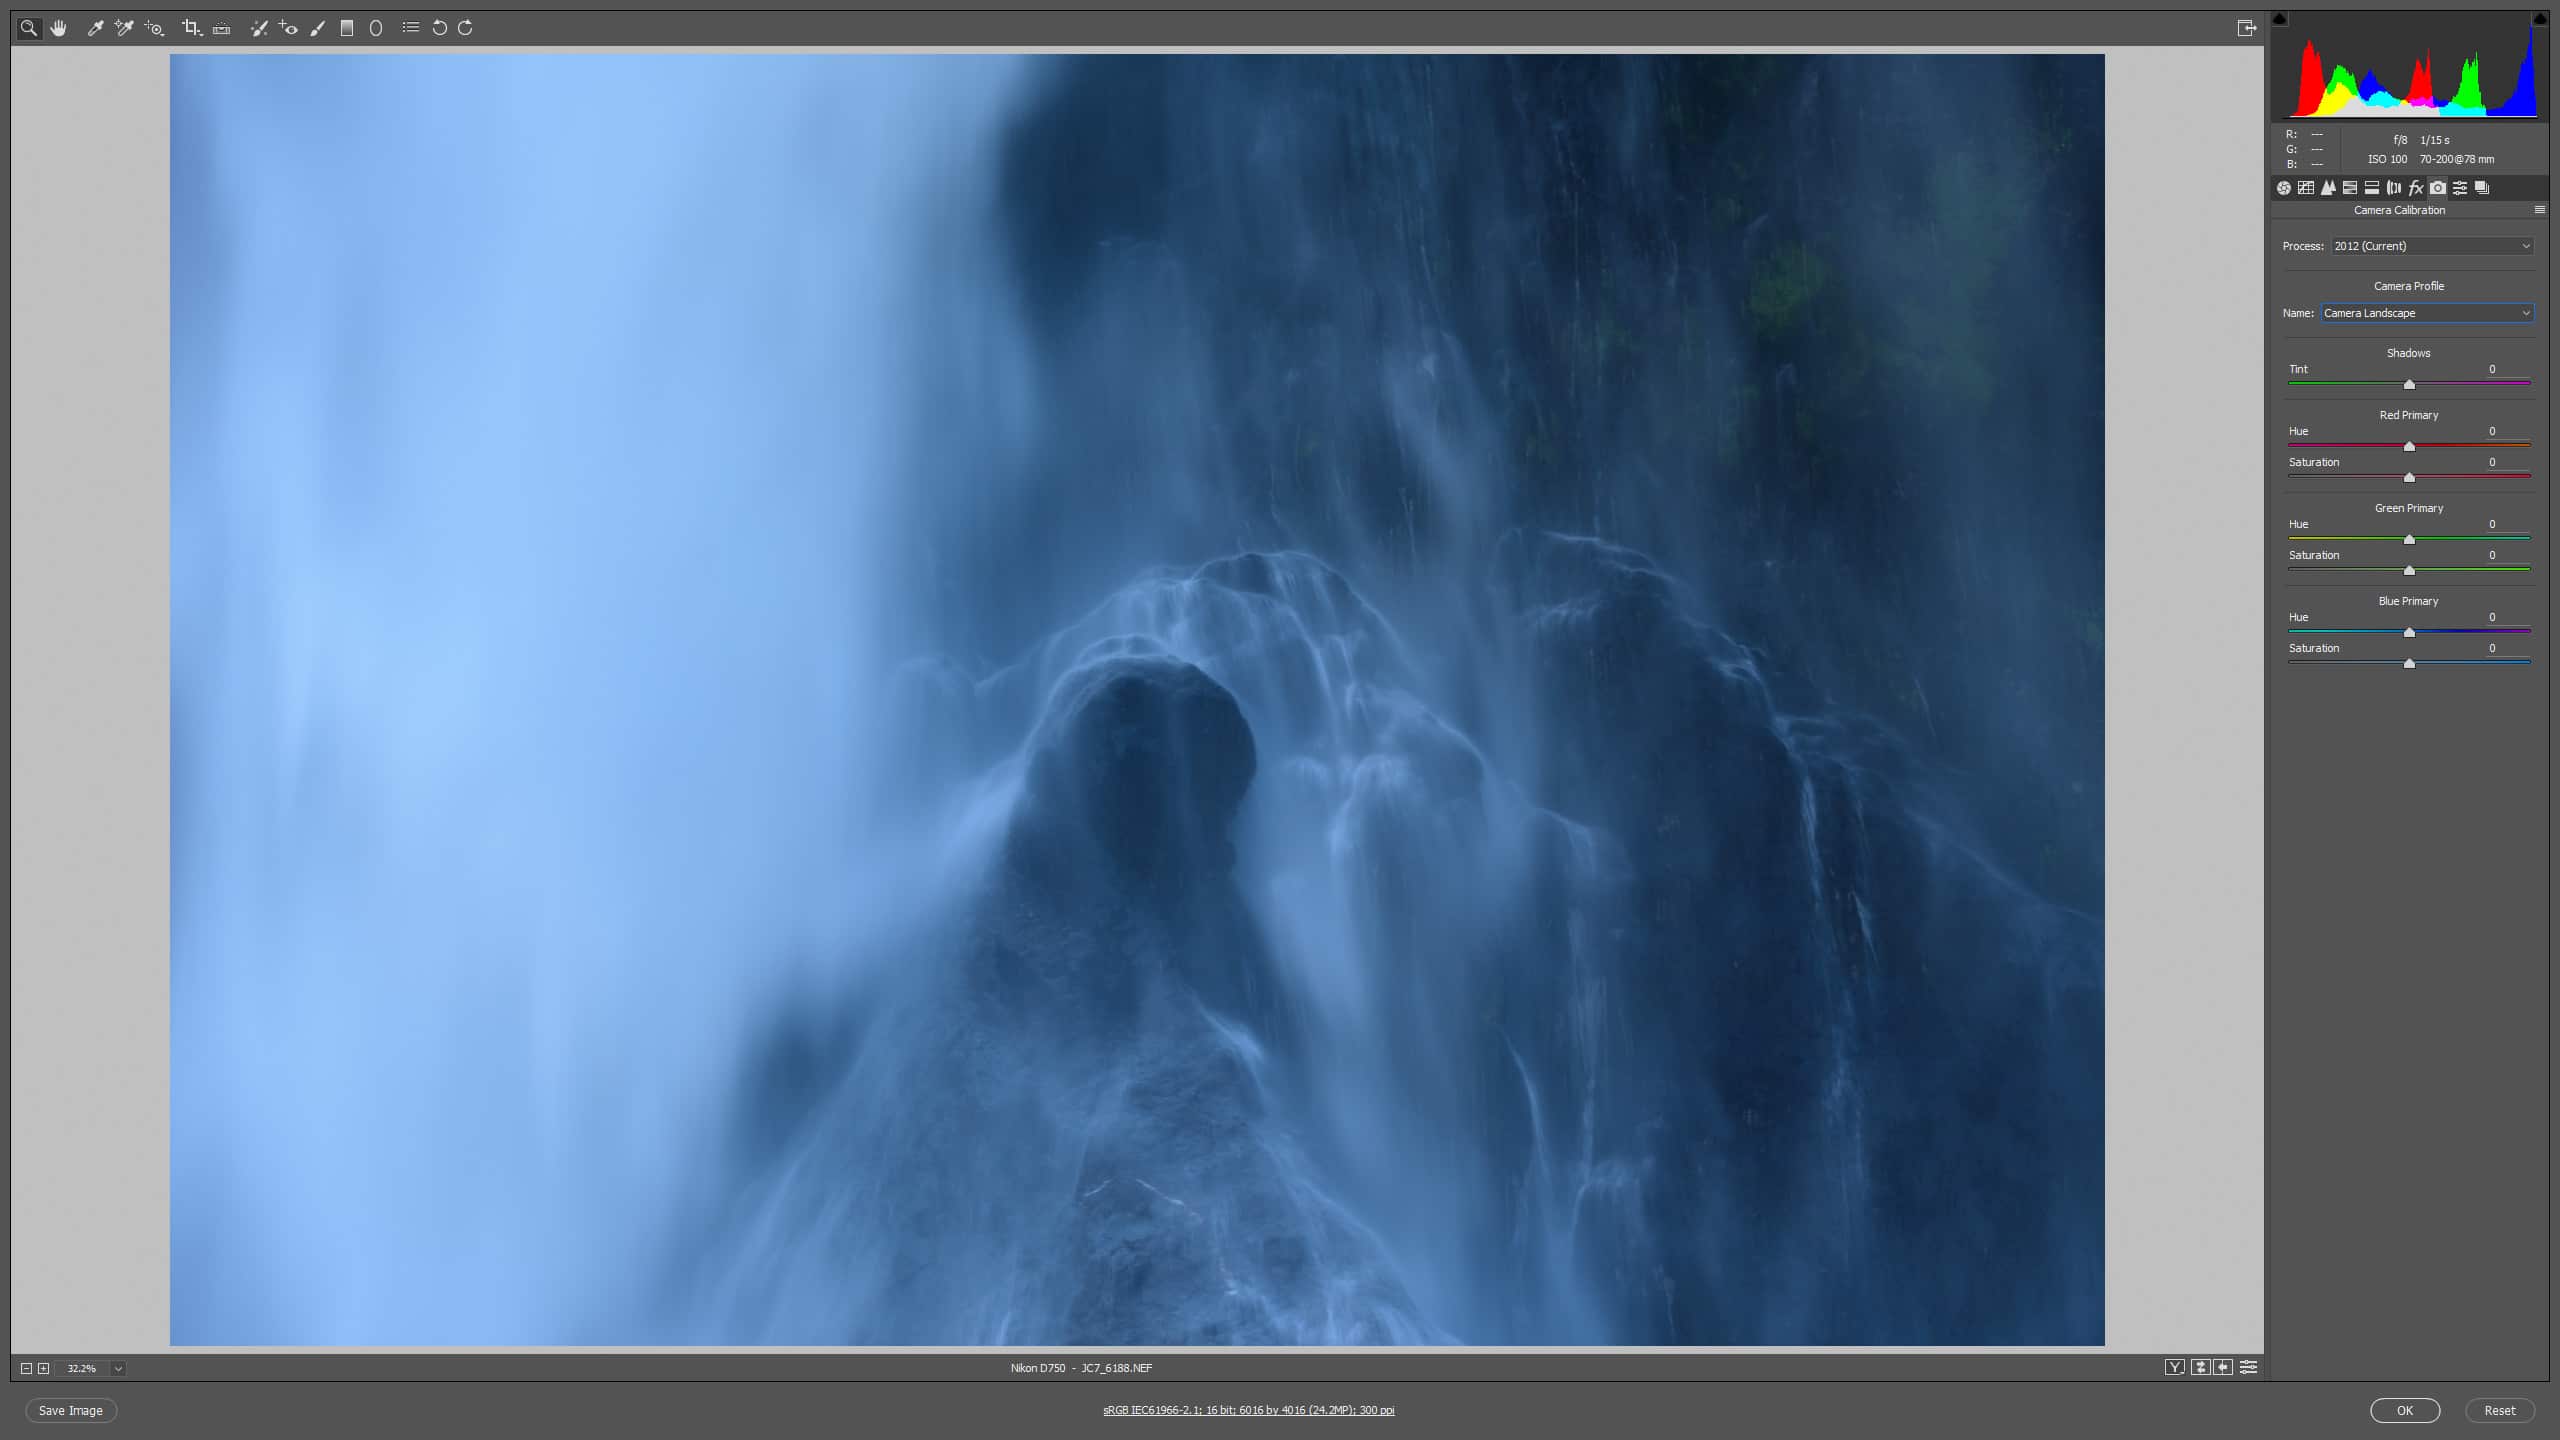
Whereas had I used a different picture control to get a more punchy image in the field, I most likely would have looked at the histogram (shown here in Landscape Picture Control) and quickly underexposed the image a bit more to make sure I wasn’t blowing the highlights, thus either making my shutter speed faster and losing some motion of the water, or stopping down the aperture and losing some sharpness to diffraction. Neither of which are ideal choices. Which is again why I shoot for the best data in the field, not instant curb appeal.
For the processing of the image I started by asking myself the question: what is interesting to me about this image? I find the interplay of the rocks and water in the center of the image to be the most fascinating part of the photo, so in my processing I want to strongly enhance the texture, detail, and contrast there, and process the rest of the photo to draw the viewer’s eye to the middle by making it subtly darker and less contrasty. Here I used Adobe Camera Raw for all edits.
First off, I added a healthy dose of DeHazing to combat the filminess of the image, along with some Clarity for local contrast and Vibrance for color. I also increased the warmth of the image to remove some of the overall blueness. Then, to improve the dynamic range of the image I dragged the Whites up and the Blacks down. To decrease the brightness of the sheet of the water on the left I pulled down the highlights.
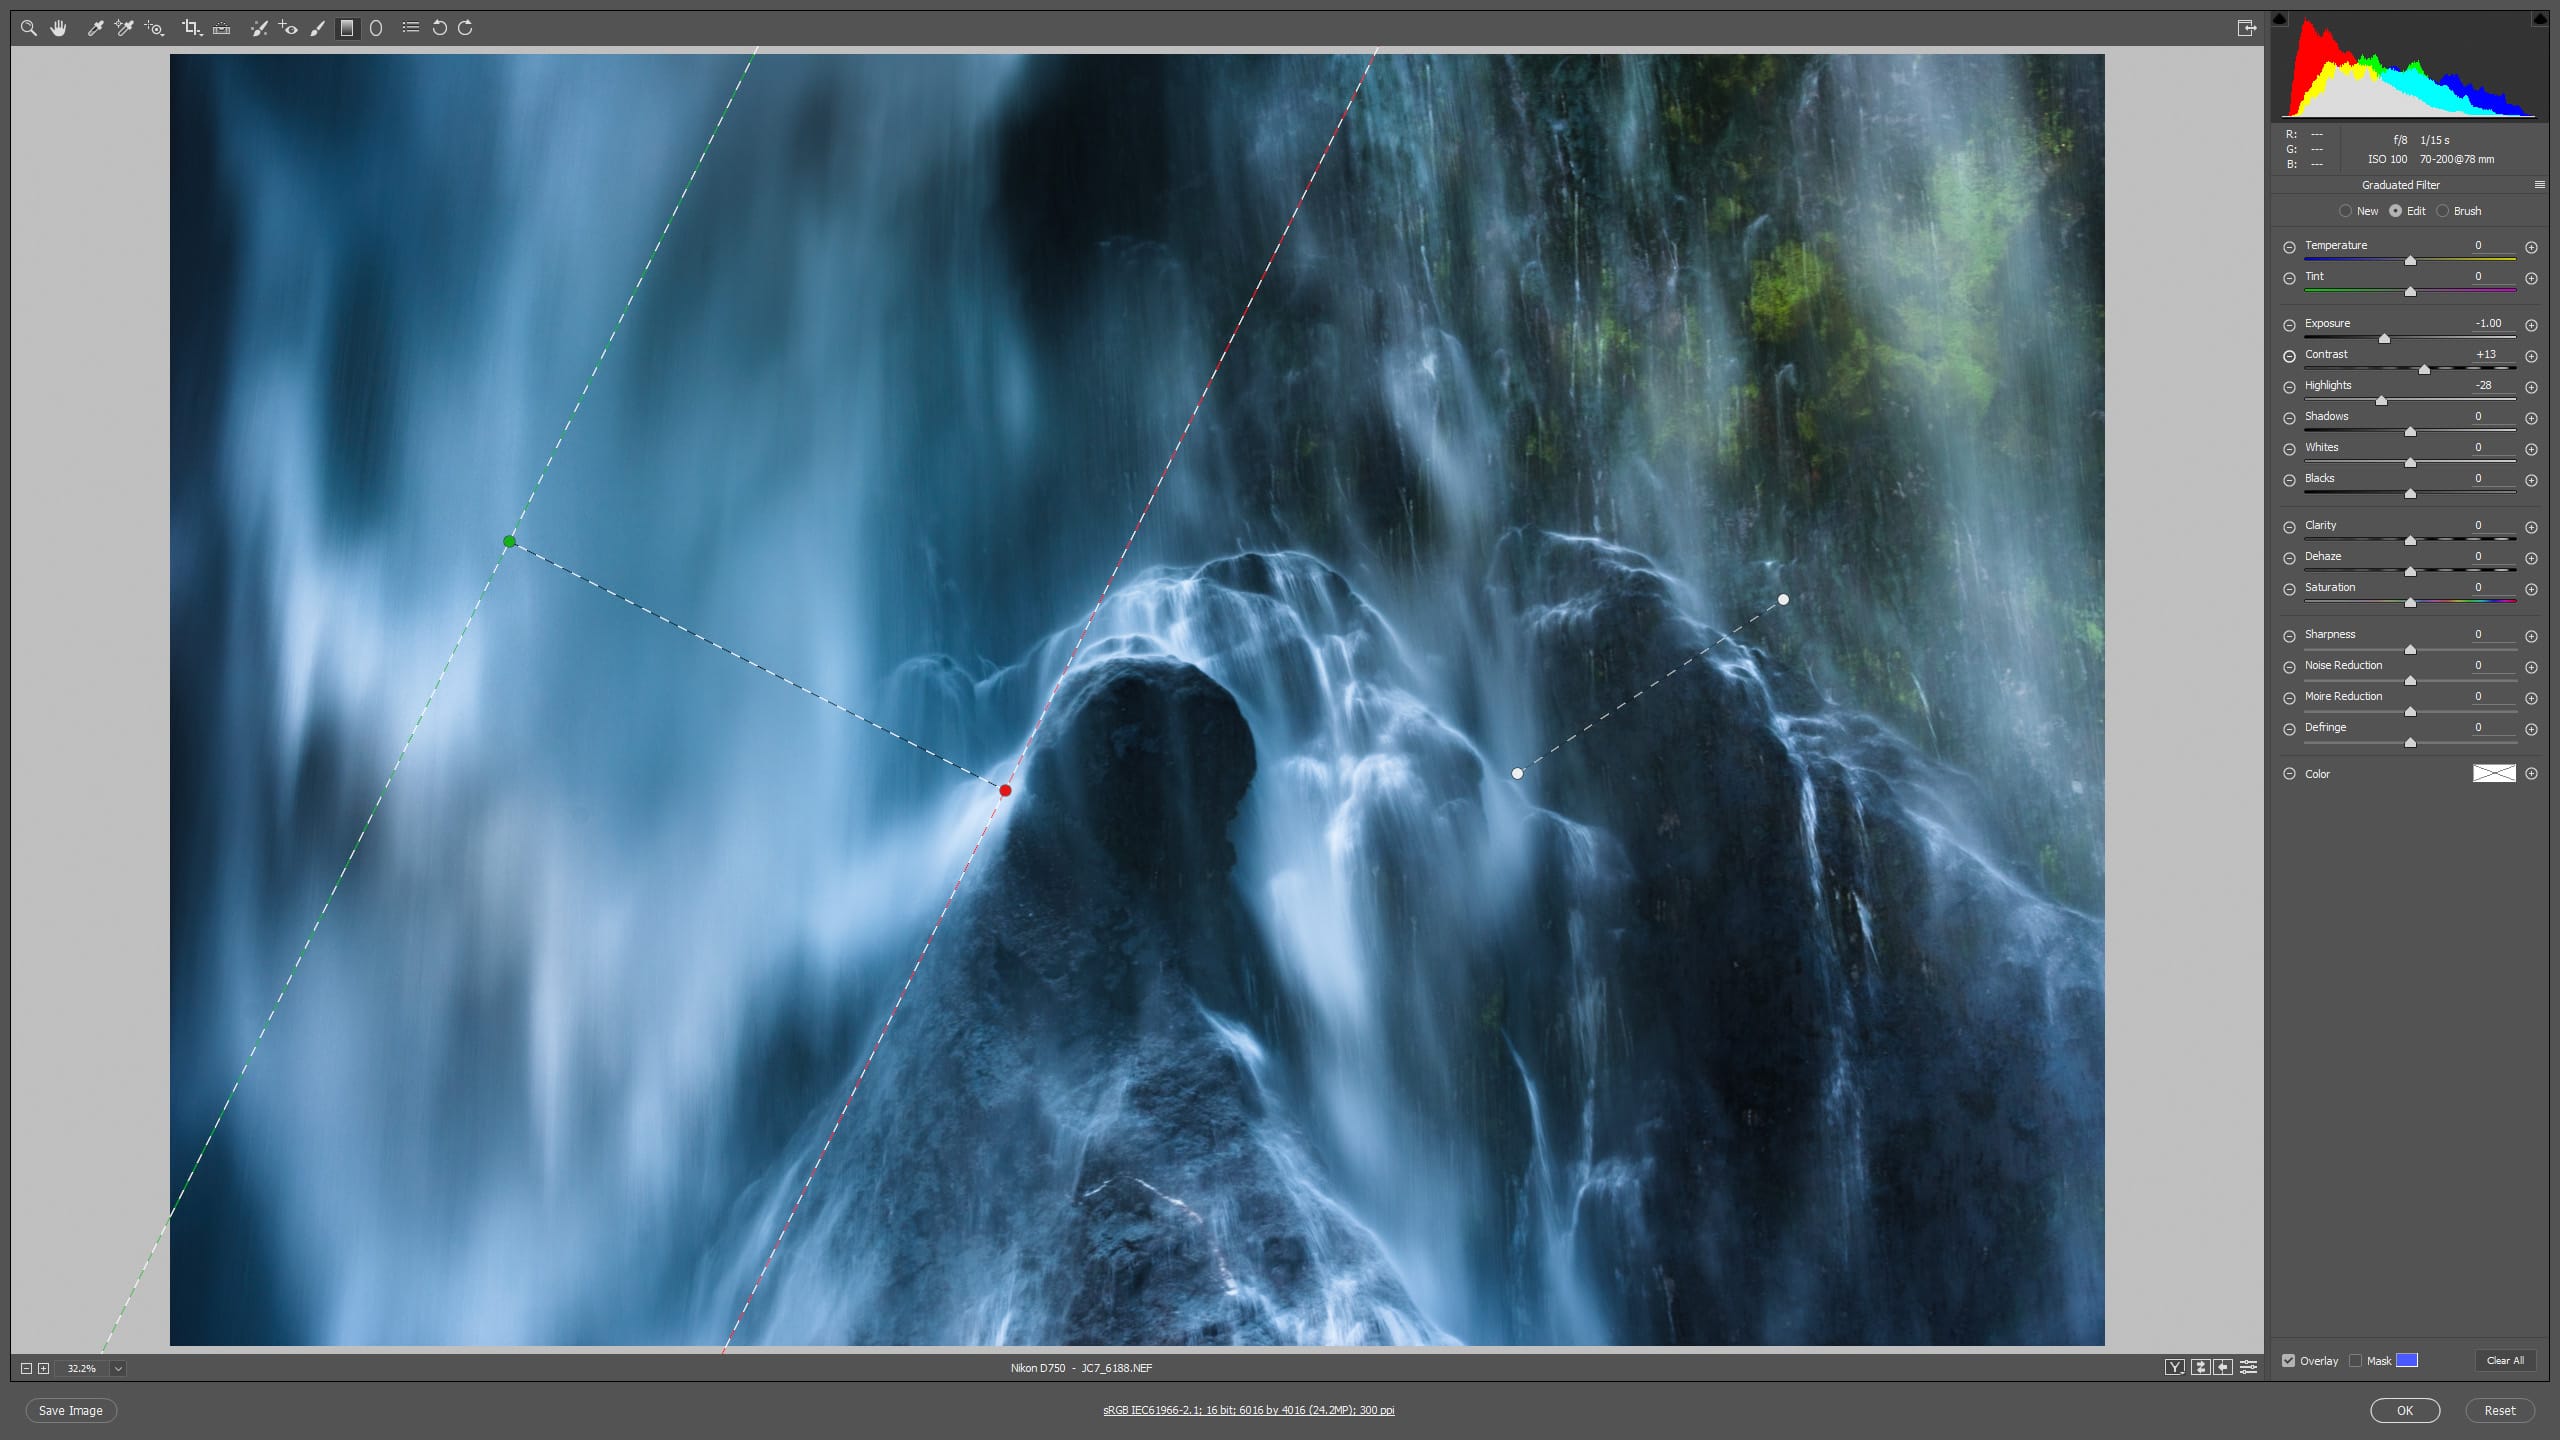
Then to really juice the contrast I made a strong s-curve tonal adjustment. This made the cool section in the middle really pop, but it also over-brightened the sheet of water on the left. So I brought in a graduated filter adjustment to darken that section. I added another grad filter on the right to brighten the top corner a bit for better tonal balance across the frame.
Finally, to help force the viewer’s eye to the interesting central part of the frame I added a small vignette to the edges. And voila, the processing was complete.

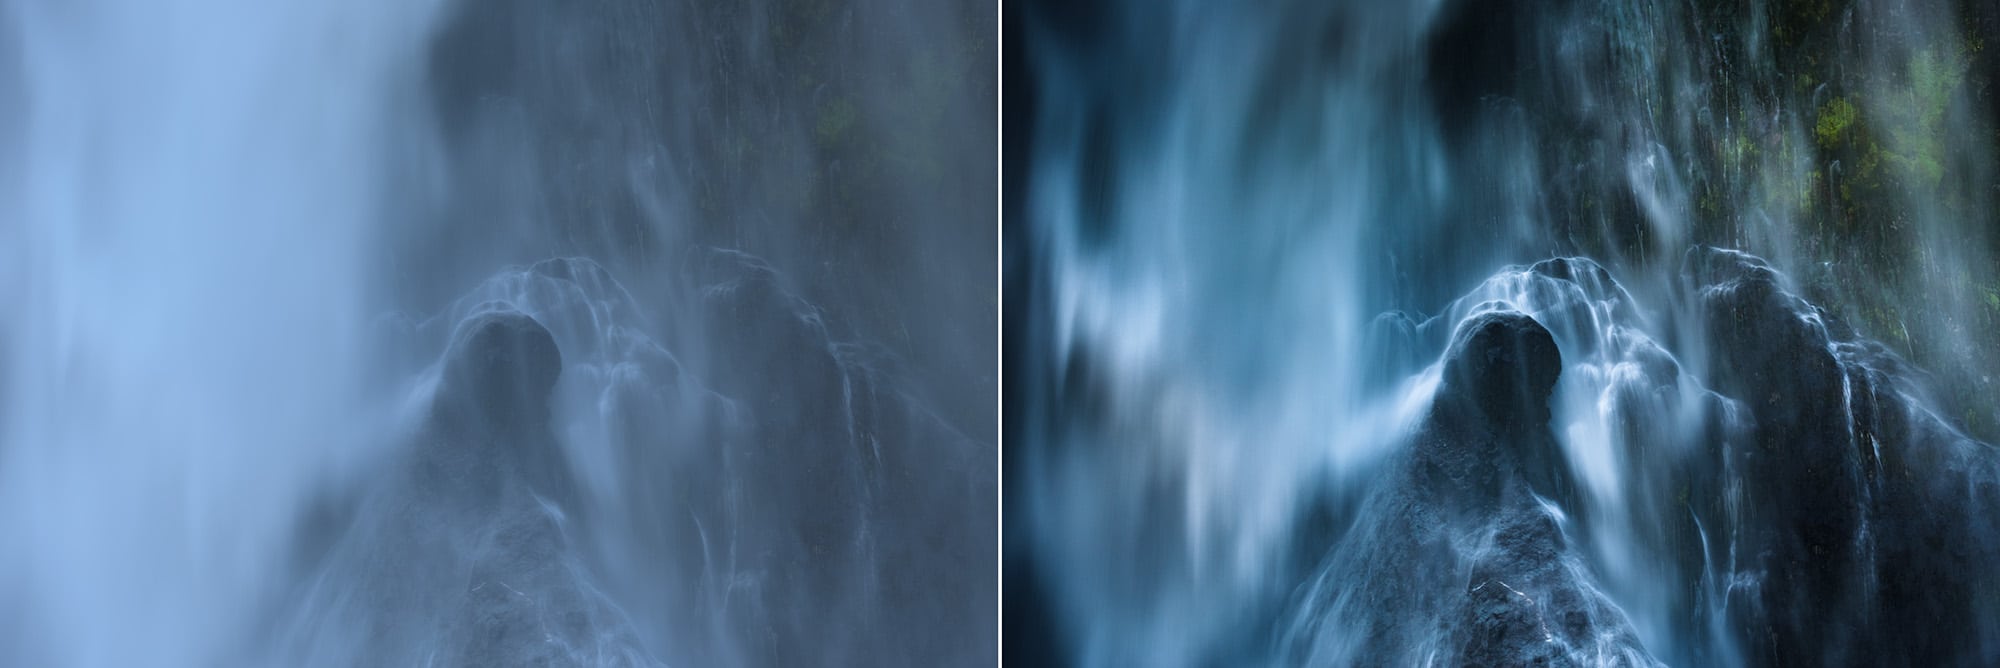
Here’s a before and after of the SOOC shot and the final image after post. You can see it’s an incredibly dramatic change, and it’s made possible entirely by not trying to create a pretty image in the field, but rather trying to capture pretty data.
Got another question? Check out our Landscape Photography FAQ here:
https://www.joshuacripps.com/landscape-photography-faq/
Be sure to subscribe to our newsletter and YouTube channel for even more landscape photography how-to.
Join Josh on Social!
http://instagram.com/joshuacrippsphotography
https://www.facebook.com/JoshuaCrippsPhotography
To master these skills for yourself, to leave the guesswork out of choosing an exposure, and to learn to process your photos with vision, be sure to check out my Adobe Camera Raw video course. This course takes you through every tool and panel in Adobe Camera Raw and teaches you not just what they do, but how to use the program intelligently and effectively to bring your raw images to life. Also take a look at Histograms Exposed from Jay and Varina Patel, a course that walks you through the steps of getting a perfect exposure and capturing good data in the field every time.
[/av_textblock]


2 Responses
Nice and interesting article! ! I was personally first introduced with shooting in RAW when I was still learning about photography and I had no idea about the big difference and how much shooting and editing in RAW can be helpful and useful to give you real quality images. I actually use this: http://www.aftershotpro.com/en/pages/raw-file/ instead of Photoshop and Lightroom Because find it much better and easier to use but no matter what software anybody is using, shooting in RAW gives more options when it comes to finalising the image you’ll use and gives you the chance to correct things that the settings on the camera might have got wrong, such as the colour temperature.
I am willing to guess that most people only use the grad filters for skies…..I use them a lot in so many places and even coming in from the sides…. Nice write up!